Getting Started with Azure Service Principal.
An Azure Service Principal is a security identity used by applications, hosted services, and automated tools to access Azure resources. Trustnest provides a structured process to request and use service accounts securely within their environment. This guide will walk you through the steps to create and use an Azure Service Principal, tailored to Trustnest's procedures and policies.
Prerequisites
- Azure CLI: Install the Azure CLI from Azure CLI. Verify the installation by running:
az --version - Permissions: Ensure you have an account associated to a TDFaccountID. (more details on TrustNest Portal)
Ask for a Service Principal
- Self Service with APIM
- Ticketing with postIT
First access to Trustnest APIM. You should sign in and having a valid subscription key for Industrialize APIM product. More details in APIM getting started
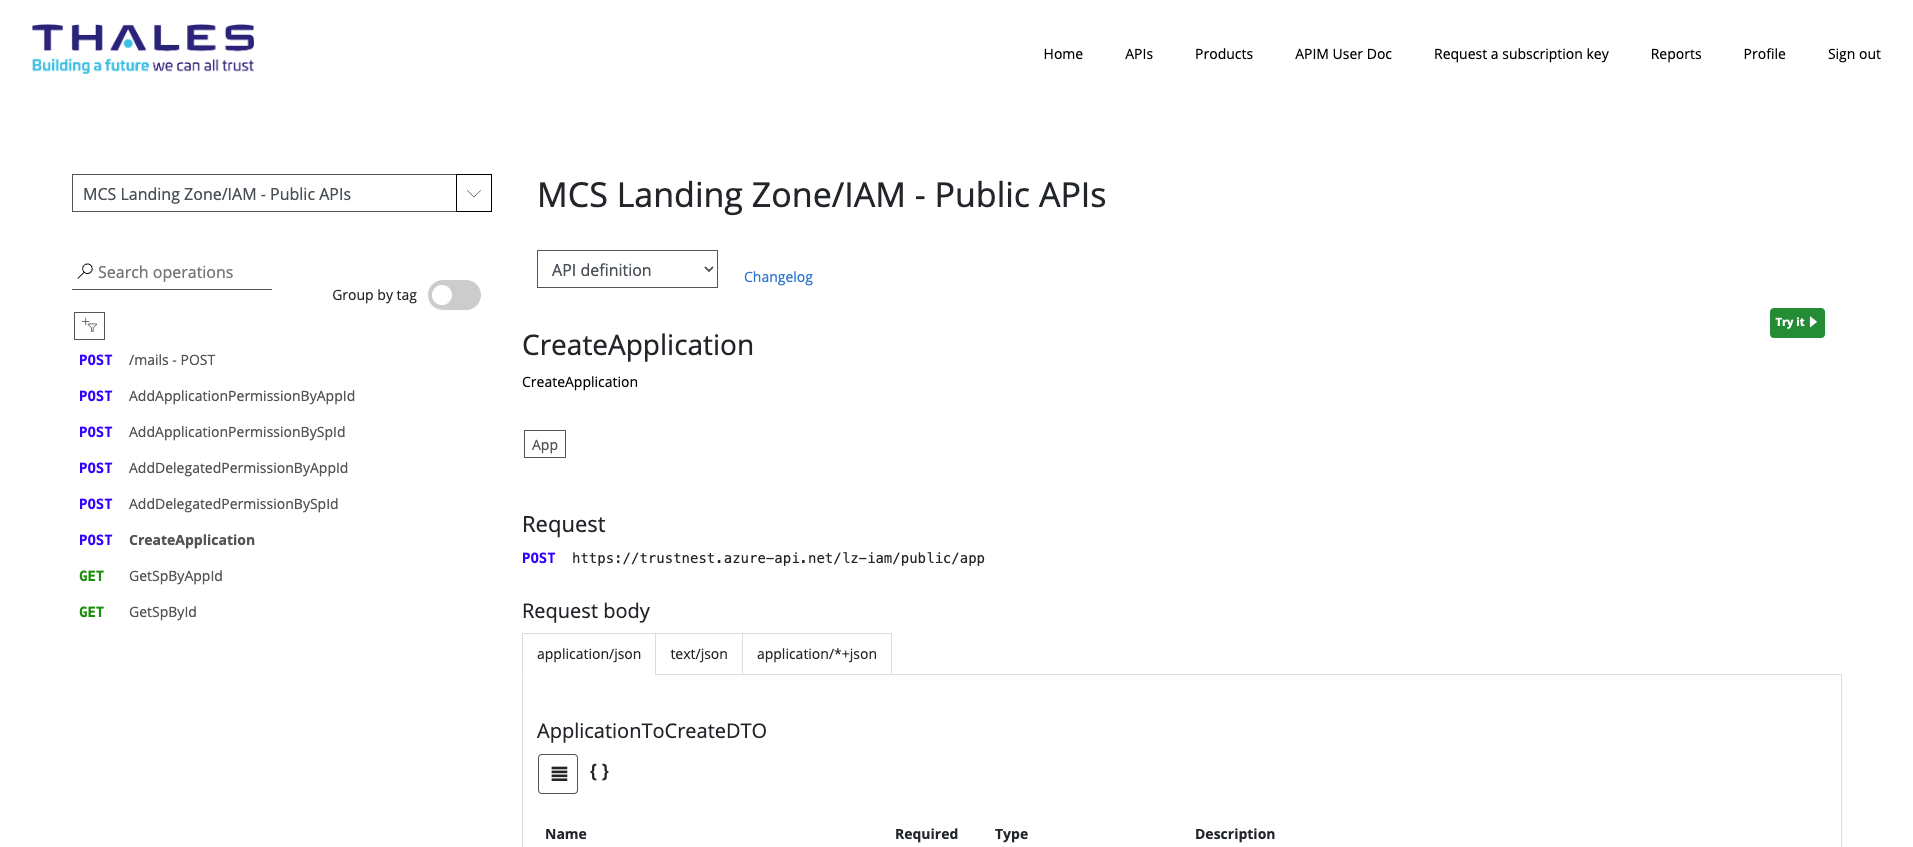
Then access to MCS Landing Zone/IAM - Public APIs and CreateApplication enpoint
you should see:

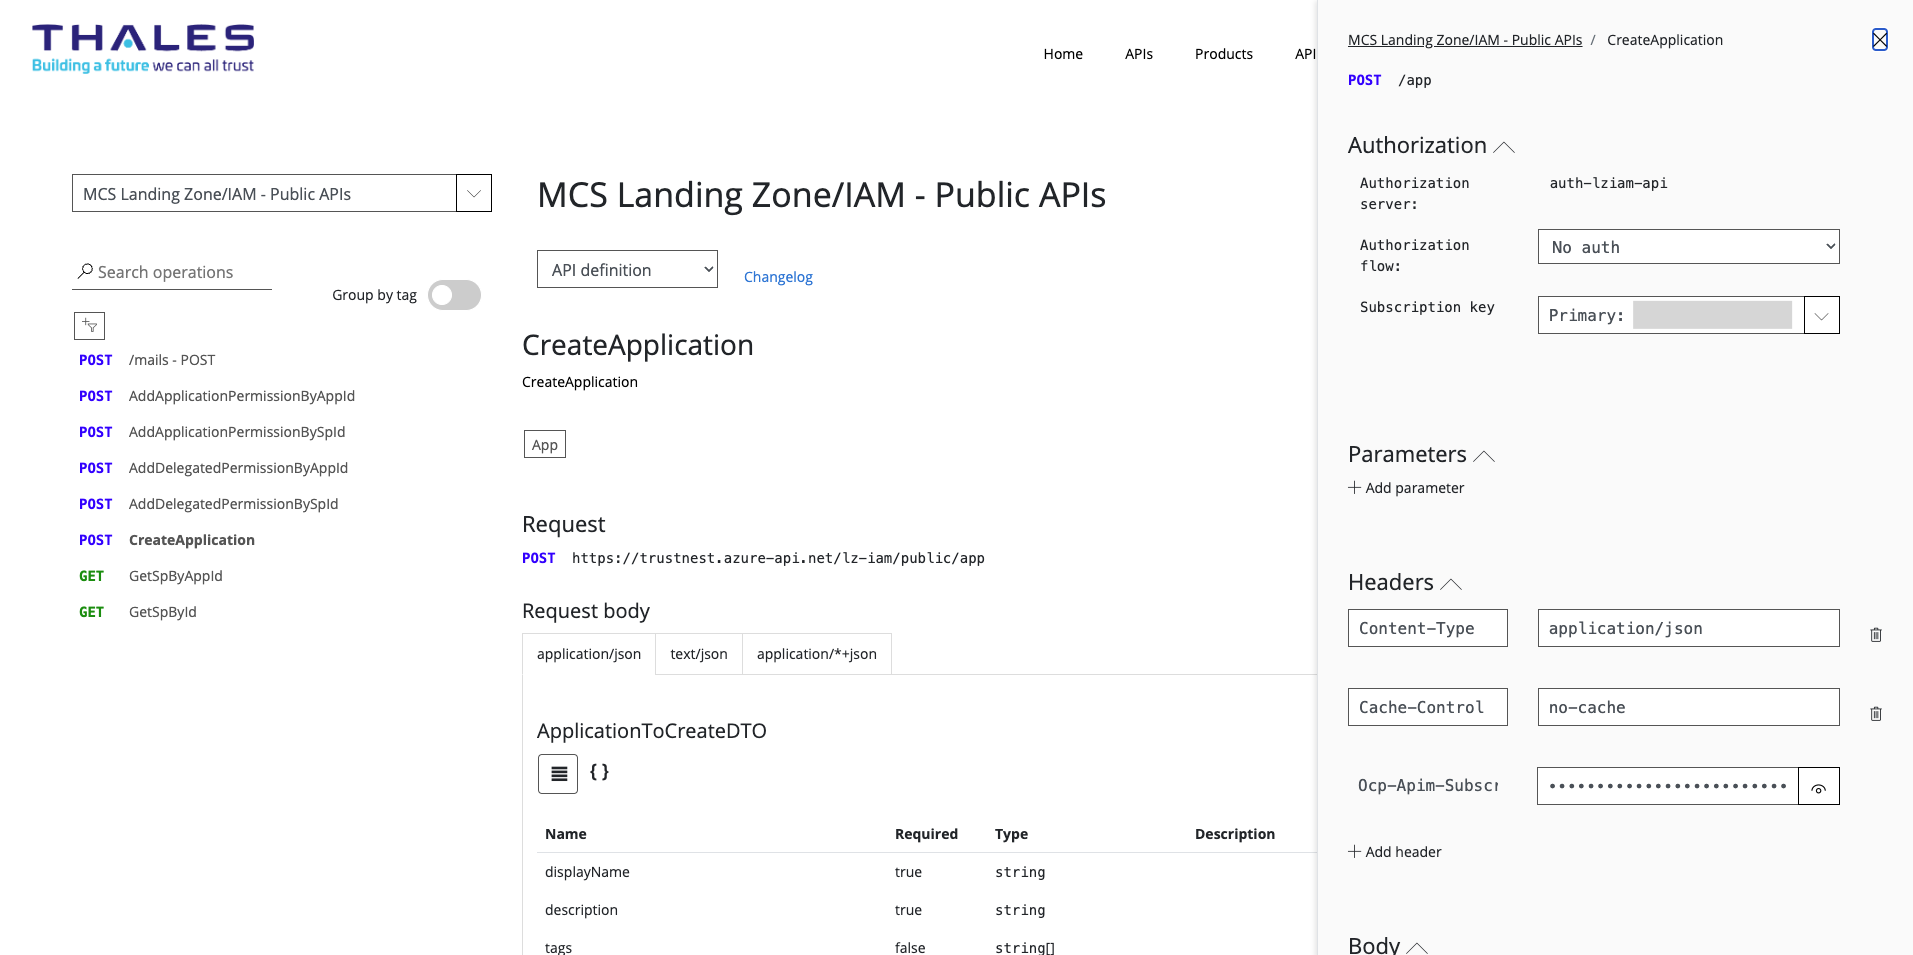
Then click on "Try It",

Get your AAD token using "Authorization flow", then go to Body field.
Enter:
{
    "displayName": "MY_SERVICE_PRINCIPAL_NAME",
    "description": "MANDATORY_DESCRIPTION",
    "billingAccountId": "string",
    "project": "PROJECT_NAME",
    "ticketId": "N/A",
    "requesterEmail": "YOUR_EMAIL",
    "projectType": "C2",
    "appCategory": "Low",
    "environmentType": "DEV"
}
Then click on "Send" (yellow button). Once the service principal is created the API returns a return code 200 and a json containing the name of the service principal and the appID (also call clientId).
if you get a 500 error:
- body is a valid JSON
- make sure all mandatory fields are properly defined
- ProjectType should be C2 or C3
- EnvironmentType should be PROD, DEV, POC, PRODUCTION or NON_PRODUCTION
- AppCategory should be Low, Medium or High
- Navigate to the Service Account Creation form via the Service Account Creation link.
- You should see a form that needs to be filled out with specific details about your project and usage.
Then, fill out the Form
Project Details:
- Project Name: Enter the name of your project. Avoid common names like demo, transversal, or common. Example:
Copernicus. - Service Principal Name: Provide the prefix for the service account (before the "@"). Example:
copernicus-cicd. - Project Type: Specify the type of project to add internal tags to your service account.
- Environment Type: Indicate the environment type, such as Prod, PoC, etc.
- Description: Describe the use cases for the service account in detail.
- Hosting Environment: Specify the service/environment that will use the service account.
- Category: Indicate the sensibility of the technical account. Low for dev, medium and high for production depending on the context.
- Service Principal Ownership: Precise would should be owner of this technical account.
The ownership is provided to both App Registration and Enterprise Application.
- Reply URL: This option should be used when you plan to use the app registration as Oauth2 proxy. The URL should fit the oauth2 URL of your application to exchange tokens.
Using the Service Principal
Once the service account is created and IP whitelisted:
-
Log In with the Service Principal
Use the Azure CLI to log in:
az login --service-principal --username <appId> --password <password> --tenant <tenant> -
Verify Access
Check access by listing resources:
az vm list --output table
Best Practices
- Secure Credentials: Use Azure Key Vault to store credentials securely.
- Least Privilege: Assign minimal required roles to the service principal.
- Regular Rotation: Rotate credentials regularly.
- Monitoring and Auditing: Regularly monitor and audit service principal activities.
Example Use Cases
Here are some common scenarios where a service principal can be utilized:
1. Pulling Artifacts from GitLab or Artifactory
In a CI/CD pipeline, a service principal can be used to authenticate and pull artifacts from GitLab or Artifactory.
stages:
  - build
  - deploy

build:
  script:
    - az login --service-principal --username <appId> --password <password> --tenant <tenant>
    - az artifacts universal download --organization <org> --project <project> --scope project --feed <feed> --name <artifact> --version <version>
2. Deploying Infrastructure with Terraform
Use a service principal to authenticate and deploy Azure infrastructure with Terraform.
provider "azurerm" {
  features {}
  subscription_id = "<subscription_id>"
  client_id       = "<appId>"
  client_secret   = "<password>"
  tenant_id       = "<tenant>"
}

resource "azurerm_resource_group" "example" {
  name     = "example-resources"
  location = "West Europe"
}
3. Running Automated Tests
Automate end-user testing by using a service principal to access resources required for test execution.
import os
from azure.identity import ClientSecretCredential
from azure.mgmt.compute import ComputeManagementClient

credential = ClientSecretCredential(
    tenant_id=os.environ["AZURE_TENANT_ID"],
    client_id=os.environ["AZURE_CLIENT_ID"],
    client_secret=os.environ["AZURE_CLIENT_SECRET"]
)

compute_client = ComputeManagementClient(credential, os.environ["AZURE_SUBSCRIPTION_ID"])

for vm in compute_client.virtual_machines.list_all():
    print(vm.name)
Conclusion
You have successfully requested and configured a service account through Trustnest. This identity can now be used by your applications and CI/CD pipelines to interact with Azure resources securely and programmatically.
For more detailed information, refer to the Trustnest IAM Documentation.
If you have any questions or need further assistance, feel free to reach out. Happy coding!